Thursday, 16 February 2017

Full Circle (part 2)


When I made my first crinoline day dress I left out the boning and chestpadding. This time I want to try and do everything as authentic as I can. Just ingnore the fact that  I used my serger when flatlining the fashion fabric to the lining fabric.😉

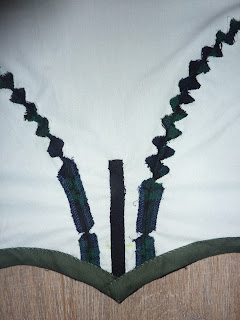
The boning center back.

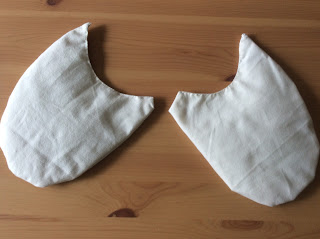
The chestpadding it was quite hard to figure out where to place them.

Looking at lots of pictures of original dresses
like this one found on the  All the pretty dresses blog
helped a lot! 
You can find my collection of images here:


The Chestpadding and front boning in place.


The sleeves are sewn in, the button holes and the black glass buttons are in place. Next on my to-do-list is sewing in the band in the waist.

When I tried the bodice with the sleeves sewn in on I felt like I looked like a football player. The poufs on the sleeves make my upperbody look huge. That combined with the width of the crinoline skirt will hopefully make my waist look tiny. A very neat optical illusion trick, but for now I have my reservations about the poufs!

The first version of this costume
without the poufs. 
To pouf or not to pouf, that's the question!

I didn't like my original crinoline it was too big for little me. So I am going to alter it into a smaller version which will be "only" 110" in circumference. I will be using the Truly Victorian pattern TV142, 1856 Walking Cage. Which is more the size of a crinoline cage for daily use according to the information on the History of Fashion and Dress website: " When it comes to the crinolines of the 1860s, bigger is not always better. Contrary to popular belief, the crinolines worn by women of this period were not as wide as folklore (or Scarlett O'Hara) wants us to believe. While the largest period crinoline I have found documented measures a whopping 225" in circumference, the majority of 1860s era extant cages only measure between 90-105" in circumference."


 The larger TV141, 1858 Round Cage is better suited for use with a ball gown if you ask me. At least when your as short as me!


The difference between the circumference is only 16", I hope this is enough to make me feel more comfortable and less like a battleship.

Tuesday, 14 February 2017

Full Circle (part 1)

Eleven years ago I started working on my first Victorian costume, a 1858 plaid crinoline day dress made with Simplicity #4400, the Fashion Historian pattern. I didn't know at the time that many 19th century outfits would follow and that my sewing skills and patience to use them properly would increase. This year I have decided to make the dress I started with again.

Simplicity #4400

The finished dress in December 2006

I have worn this dress twice before moving on to another Victorian era, the second bustle period 1883-1891, I was never really comfortable in the crinoline cage, not that there was any physical discomfort but it felt out of proportion. I am quite small and the crinoline cage, made with TV141 1858 Round cage crinoline (excellent pattern by the way), with it's 126"circumference made me feel huge!  Several of my friends have worn this costume and we all had the same problem. So I decided to convert the dress to an earlier dress by taking out the excess fabric in the skirt and wearing it with a quilted petticoat. The added bonus of wearing a quilted petticoat is that it's really nice and warm. Which is nice because both our Victorian events take place in the winter.

This is how the costume looks now.

The fabric for bodice of the current version of the crinoline day dress had been cut eleven years ago as a mock up model. It had been seen together hastily, as it is a lovely woollen plaid fabric, I took it apart and put it back together again this time with more care and much more years of sewing experience. When I made this pattern the first time I left out the poufs on the sleeves because I thought they where to difficult. This time I did make them as a challenge and to make the new version differ from the old version. I thoroughly dislike it when it's too visible that people, especially within a group, have used the same pattern.

Here are some in progress pictures:

Front in progress

Back in progress.


Working on the pouf on the sleeve.

While I was working on the pouf for the sleeve I was watching Victoria, the television series with Jenna Coleman, and to my great delight it was the episode with the Queen Victoria Privy Council dress! The sleeves on this dress have much more poufs but it was inspiring nonetheless.


Jenna Coleman in Victoria wearing a reproduction of Victoria's Privy Council dress.

The original gown has faded from black to the color is has today but you can still see that they made a wonderful reproduction.

Here a picture of the original dress on display


finished sleeve

I am quite happy with how my sleeves turned out but it probably would have been easier to work with thinner fabric, like silk or a lightweight wool.