Tuesday, 20 December 2016

It's Beginning to Look a Lot Like Christmas (Dickens festijn 2016,Deventer)

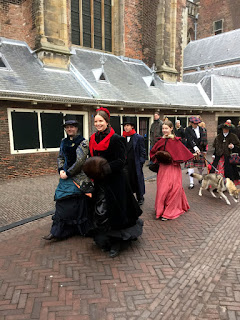
Dickens festijn in Deventer is for me the best way to get into the spirit of Christmas. These pictures where made just after closing time when there wasn't much public left. Although the atmosphere is already magical in the daytime it becomes even more magical when it's dark and all the christmas lights are on.

The costume without coat and hat.


Victorian mailman by day,
photographer by night.
Thanks Richard for the pictures!


This photo was taken on Sunday by Rob van der Laan, Shoppen in Deventer.
Who on Saturday had also made these lovely portraits of two other Gracieuse members.


Friday, 16 December 2016

All squared up and still now throw

When I was in the hospital my husband brought me my crochet stuff so I could continue to work on our Granny Square Christmas Throw (or Afghan). He knows that having to sit still drives me nuts, so having my crochet stuff there was really great.

I started working on the throw September 2015, when I knew we where going to move house. I liked the idea of working on something for the new house but couldn't do any big projects because I needed to start sorting and packing stuff. Those little squares are nice little and fast projects you can work on in between other things. Unfortunately I ran out of yarn and the colors I needed weren't being sold anymore.
Fast forward to a year later. I remember the throw and start looking on secondhand websites for the yarn and lo and behold I stumble on the right colors in the right amount of yarn!

Now I have enough to make a throw I start getting annoyed with the small size of my squares. If I have to make a whole blanket with them I will have to make an enormous amount of them to get the right size. So I decided to add another row of stitches.


before

after

Around the 10th of  November I had enough squares, a 170 of them to be exact. Then it was time to block them to get a nicer shape.

a granny square, after blocking, in the proces of being blocked and before blocking.
The difference is subtle but the blocked square does look neater.


I tried two methods of joining the squares together and decided to go with the bottom version.

But after making two pieces like this I decided the end result is too wonky. So I am all squared up but still now throw! (Bad pun I know but I can never resist one)

Yikes!


Tuesday, 13 December 2016

Het Straatje van Emma

The weather was soft, the company was good and a merry time was had by all. The first t' Straatje van Emma ( The Street of Emma) was a succes. The name honors the Dutch Queen Emma, the wife of King Willem III. Who became Queen Regent for her daughter Wilhelmina after his death on the 23th of November in 1890.

The (in)famous blue coat in action. I think the best part 
of the coat are the pockets.

Greeting Queen Emma 


picture taken by Paul Veldhuis.
Roel and Noortje in there home for the day.
I think they make a lovely couple.

picture taken by www.txellalarcon.com
Making wooden neckties

picture taken by Matthieu Besteman
With Alice, my son, my niece in our living room for the day.
A lot of really nice people came in to say hello.

My son with his cousin who ofcourse played his sister.
They had a lot of fun together.

I was a very proud aunt!


Our group De Gracieuse.


Wednesday, 7 December 2016

The (in)famous blue coat.

Is it just me or does Murphy's law always apply for those pieces of costume that need to be made in a hurry?

It all started December last year when my son decided that he wanted a grown-up 19th century costume. I feel like making such a complicated outfit for a growing young man is a horrible waste of time so we decided to purchase most of the costume pieces second hand. Vintage is still more affordable than making myself. So it seemed like a good idea and it was! We bought a set consisting of a coat, vest and a pair of pants. The pant weren't in my son his size, he quite long and slender, so a pair of pants needed to be made. As I had been promising my husband a new pair of pants, I decided to not work on a costume for myself this year and concentrate on making my two handsome men look even better.

The trouser for son were finished on schedule and the trousers for my husband were also finished on schedule somewhere at the end of September or beginning of October. After looking for months we decided that the overcoat or cloak needed to be made. We couldn't find a suitable one that also fitted my son. When asked he told me that he wanted a coat not a cloak. We plenty of time until the event I agreed to making a coat for him. I had already ordered the fabric when disaster struck. I got ill, it started out harmeless enough but it turned nasty and I was even hospitalized for five days. After that I needed time to recover. All in all I lost more than a month of sewing time!

I had previously bought two coat patterns, one Victorian style (Simplicity 2517 The Sherlock Holmes Coat) and one Edwardian style (Simplicity 2581 Edwardian Driving Coat).


To my great dismay my son wasn't really interested in either one of them. When I asked him what kind of coat he wanted he showed me this picture.


He wanted the blue coat from Fantastic Beast and where to find them. I wasn't really thrilled about it because the film is set in the mid nineteen twenties but as we consider ourselves lucky that he still wants to join us at events. We thought that a little cheating wouldn't be that bad. 

I ended up combing the patterns I already owned and I am happy to say the coat is almost finished but it has been a real struggle. The event is this Saturday and there is still an awful lot to do! First things first, finishing the (in)famous blue coat.

For those of you in the neighborhood. Our group will be attending this event:


Tuesday, 6 September 2016

My Victorian Traveler Bag


My Traveler aka Carpet bag is finally finished! I am quite happy with how it turned out. Still want a bigger version though :)

When I made the bag I was looking at the measurements of originals, reproductions and ofcourse the original Mary Poppins bag movie prop and wrote down the measurements. So I could scale them down to fit my bag frame. Later on I wanted to check on how big, a bigger version would have to be. If I wanted it to be same size as the movie prop but couldn't find the measurements anywhere on-line anymore! I did find my own notes, but I wrote down the sizes of a lot of bags without naming them. I do remember the movie prop as being the largest one. So if  (big if people!) I remember correctly the measurents are: 21 inch wide, 17 inch tall and 7 inch depth.

Please correct me if I am wrong or tell if you know I'm right!

The original Mary Poppins bag

For more pictures of the Mary Poppins exhibit 
at the D23 Expo 2013


Friday, 2 September 2016

Viking life

Yo ho, yo ho, a viking life for me.
We pillage, we plunder, we archer and loot....

Last weekend we attended a viking event at the Archeon. The weather was great, the company was great. So even though school and work have started again it felt like a little vacation. In fact we had such a wonderful time we did't get around to making a lot of pictures. We were to busy enjoying ourselves.

Our neigbours tent with a roman boat in the background.

It might be a reconstruction of a Roman boat,
I still think it looks cool!

Our tent with my chair and our banner

I still have a lot to learn but I really enjoy doing it!

Lucky shot! ;-)

We also had a viking vacation in our vacation. Again we had lovely weather, a wonderful location and great company. I still owe you the pictures, so I am posting them here.


Enough pictures for now. If you want to see more visit the album on our facebook page: Prehistorisch Dorp Eindhoven

Although I love doing early medieval events I am really happy that I have a later medieval event to look forward to. At the end of this month we will be joining some friends at the Prehistorisch Dorp Eindhoven for some 13th century fun.

Thursday, 11 August 2016

Victorian Carpet or traveler bag

Oh, how I miss sewing! Although it is very rewarding to see our house looking better and better, the garden is my favorite spot, as I like making things beautiful. I really do miss sewing, crafting and costuming most of all.
A while ago I started working on a victorian carpet bag. Which I didn't share with you because we are having some trouble with the hinges and it is still not finished. As that might take a while, my husband is still working very hard on our house, I decided to share it with you anyway!
I had been wanting to make a carpet bag for years but so I was very happy when I found the Mommy Poppins Bag pattern by Sewfearless.com. With some modifications it makes a wonderful victorian era carpet bag but unmodified it makes very nice bag as well.

Enough with the talk. Here are some pictures:

The linen lining flat-out.
Hard to make out from the picture but the 
fabric for the pockets is already in place.

The outer fabric with the leather bottom

the leather handles are sewn on.

The casing sewn on

The lining has been sewn in.

The metal bag frame is in place.

A look inside.


I used a 14,96 inch (38 cm) internal dulles frame, the largest size I could find at the time. Sold by Vacheta on Etsy. These resemble the original frames better that the tubular frame described in the pattern.

Drawing of an original frame

Original frame and bag pattern.


My frame
https://www.etsy.com/listing/246757116/internal-dulles-frame21cm38cm-5-size-of

Somehow  we have a problem with the frame it will not close properly. This is probably due to the thick and stiff fabric I used for the casing. At this moment I am unwilling to rip the whole bag apart again to replace the casing. I just might have to though. If we don't come up with a solution.

The fabric used is not a carpet but a gobelin to match the look of the originals made with panels in embroidery (berlin work). 

From a German Ladies Magazine.
Source:pinterest

I do not have the patience to embroider my own panels and I couldn't find a affordable carpet that I liked. So this was a good solution. I choose a fabric that reminded me of the Carpet bag in Mary Poppins, the inspiration for this project.


the original movie prop from Mary Poppins

Instead of using plastic to stiffen up the bottom of the bag. We used a thin sheet of wood and added brass colored spots ("feet"). Also bought at Vacheta. Feet like these are often found on the bottom of original bags. 

https://www.etsy.com/listing/246661429/round-spots-for-bag-bottom-ver3-4ea-1set

Because just looking at a bag it's feet is no
fun, here is the front. 
Source: Ebay.co.uk

Thinks I would do differently if I was to make a bag with this pattern again. I would go for a larger size frame. Since I have finished the bag I found some bigger sizes available online. Most of the authentic era bags are larger, often around 20 inch wide. Which makes the bag better suited for it's purpose. I would add a lock, the bag I made now is to small to fit one and I would stiffen the fabric of the bag less or make a casing of thinner fabric, or use a different type of frame. I am quite fed up with having a nearly finished bag in the house!

Here is some eye candy to end this blog with.

18 inch carpet bag, 1860-70

22 inch wide by 16 inc tall 19th century carpet bag.

19 5/16 x 14 3/16 inch carpet bag, ca.1865
Source: The Met 

And for those of you with a little more patience.
Design for traveling bag, 
1864 La Mode illustrée: journal de la famille